Integration with an Android Fragment
The guide for Integration with Existing Apps details how to integrate a full-screen React Native app into an existing Android app as an Activity.
To use React Native components within Fragments in an existing app requires some additional setup.
1. Add React Native to your app
Follow the guide for Integration with Existing Apps until the end to make sure you can safely run your React Native app in a full screen Activity.
2. Add a FrameLayout for the React Native Fragment
In this example, we're going to use a FrameLayout to add a React Native Fragment to an Activity. This approach is flexible enough and can be adapted to use React Native in other layouts such as Bottom Sheets or Tab Layouts.
First add a <FrameLayout> with an id, width and height to your Activity's layout (e.g. main_activity.xml in the res/layouts folder). This is the layout you will find to render your React Native Fragment.
<FrameLayout
    android:id="@+id/react_native_fragment"
    android:layout_width="match_parent"
    android:layout_height="match_parent" />
3. Make your host Activity implement DefaultHardwareBackBtnHandler
As your host activity is not a ReactActivity, you need to implement the DefaultHardwareBackBtnHandler interface to handle the back button press event.
This is required by React Native to handle the back button press event.
Go into your host activity and make sure it implements the DefaultHardwareBackBtnHandler interface:
Activity.onBackPressed() has been deprecated since API level 33. Android 16 devices with apps targeting API level 36 this will no longer be called and OnBackPressedDispatcher should be used instead.
- Java
- Kotlin
package <your-package-here>

import android.os.Bundle
import androidx.appcompat.app.AppCompatActivity
+import com.facebook.react.modules.core.DefaultHardwareBackBtnHandler

+class MainActivity : AppCompatActivity() {
+class MainActivity : AppCompatActivity(), DefaultHardwareBackBtnHandler {

    override fun onCreate(savedInstanceState: Bundle?) {
        super.onCreate(savedInstanceState)
        setContentView(R.layout.main_activity)

        findViewById<Button>(R.id.sample_button).setOnClickListener {
            // Handle button click
        }
    }

+   override fun invokeDefaultOnBackPressed() {
+       onBackPressedDispatcher.onBackPressed()
+   }
}
package <your-package-here>;

import android.os.Bundle;
import androidx.appcompat.app.AppCompatActivity;
+import com.facebook.react.modules.core.DefaultHardwareBackBtnHandler;

-class MainActivity extends AppCompatActivity {
+class MainActivity extends AppCompatActivity implements DefaultHardwareBackBtnHandler {

    @Override
    protected void onCreate(@Nullable Bundle savedInstanceState) {
        super.onCreate(savedInstanceState);
        setContentView(R.layout.main_activity);

        findViewById(R.id.button_appcompose).setOnClickListener(button -> {
            // Handle button click
        });
    }

+   @Override
+   public void invokeDefaultOnBackPressed() {
+       getOnBackPressedDispatcher().onBackPressed();
+   }
}
4. Add a React Native Fragment to the FrameLayout
Finally, we can update the Activity to add a React Native Fragment to the FrameLayout.
In this specific example, we're going to assume that your Activity has a button with id sample_button that when clicked will render a React Native Fragment into the FrameLayout.
Update your Activity's onCreate method as follows:
- Java
- Kotlin
package <your-package-here>

import android.os.Bundle
import androidx.appcompat.app.AppCompatActivity
+import com.facebook.react.ReactFragment
import com.facebook.react.modules.core.DefaultHardwareBackBtnHandler

public class MainActivity : AppCompatActivity(), DefaultHardwareBackBtnHandler {

    override fun onCreate(savedInstanceState: Bundle?) {
        super.onCreate(savedInstanceState)
        setContentView(R.layout.main_activity)

        findViewById<Button>(R.id.sample_button).setOnClickListener {
+           val reactNativeFragment = ReactFragment.Builder()
+               .setComponentName("HelloWorld")
+               .setLaunchOptions(Bundle().apply { putString("message", "my value") })
+               .build()
+           supportFragmentManager
+               .beginTransaction()
+               .add(R.id.react_native_fragment, reactNativeFragment)
+               .commit()
        }
    }

   override fun invokeDefaultOnBackPressed() {
       super.onBackPressed()
   }
}
package <your-package-here>;

import android.os.Bundle;
import androidx.appcompat.app.AppCompatActivity;
+import com.facebook.react.ReactFragment;
import com.facebook.react.modules.core.DefaultHardwareBackBtnHandler;

public class MainActivity extends AppCompatActivity implements DefaultHardwareBackBtnHandler {

    @Override
    protected void onCreate(@Nullable Bundle savedInstanceState) {
        super.onCreate(savedInstanceState);
        setContentView(R.layout.main_activity);

        findViewById(R.id.button_appcompose).setOnClickListener(button -> {
+           Bundle launchOptions = new Bundle();
+           launchOptions.putString("message", "my value");
+
+           ReactFragment fragment = new ReactFragment.Builder()
+                   .setComponentName("HelloWorld")
+                   .setLaunchOptions(launchOptions)
+                   .build();
+           getSupportFragmentManager()
+                   .beginTransaction()
+                   .add(R.id.react_native_fragment, fragment)
+                   .commit();
        });
    }

    @Override
    public void invokeDefaultOnBackPressed() {
        super.onBackPressed();
    }
}
Let's look at the code above.
The ReactFragment.Builder() is used to create a new ReactFragment and then we use the supportFragmentManager to add that Fragment to the FrameLayout.
Inside the builder you can customize how the fragment is created:
setComponentNameis the name of the component you want to render. It's the same string specified in yourindex.jsinside theregisterComponentmethod.setLaunchOptionsis an optional method to pass initial props to your component. This is optional and you can remove it if you don't use it.
5. Test your integration
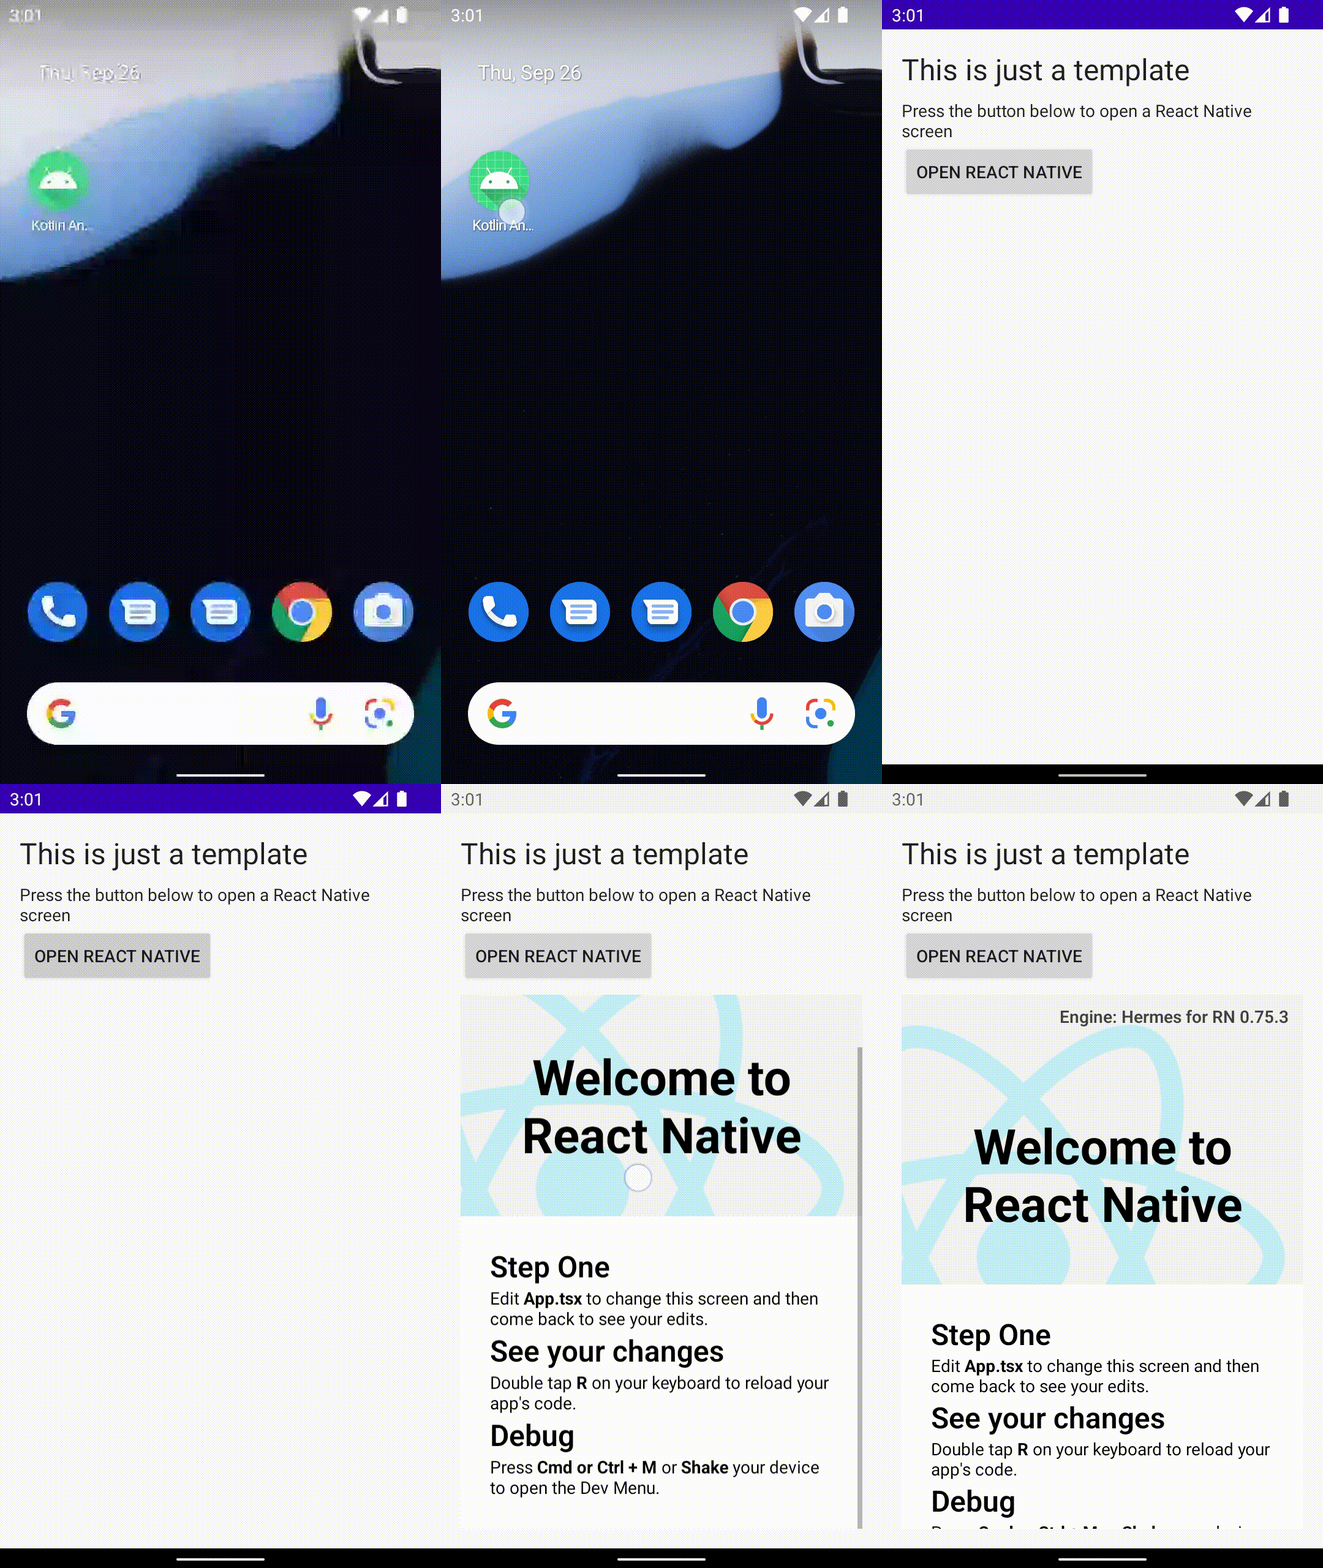
Make sure you run yarn start to run the bundler and then run your android app in Android Studio. The app should load the JavaScript/TypeScript code from the development server and display it in your React Native Fragment in the Activity.
Your app should look like this one:
