Fabric Native Components: iOS
Now it's time to write some iOS platform code to be able to render the web view. The steps you need to follow are:
- Run Codegen.
- Write the code for the
RCTWebView - Register the
RCTWebViewin the application
1. Run Codegen
You can manually run the Codegen, however it's simpler to use the application you're going to demo the component in to do this for you.
cd ios
bundle install
bundle exec pod install
Importantly you will see logging output from Codegen, which we're going to use in Xcode to build our WebView native component.
You should be careful about committing generated code to your repository. Generated code is specific to each version of React Native. Use npm peerDependencies to restrict compatibility with version of React Native.
3. Write the RCTWebView
We need to prepare your iOS project using Xcode by completing these 5 steps:
- Open the CocoaPods generated Xcode Workspace:
cd ios
open Demo.xcworkspace
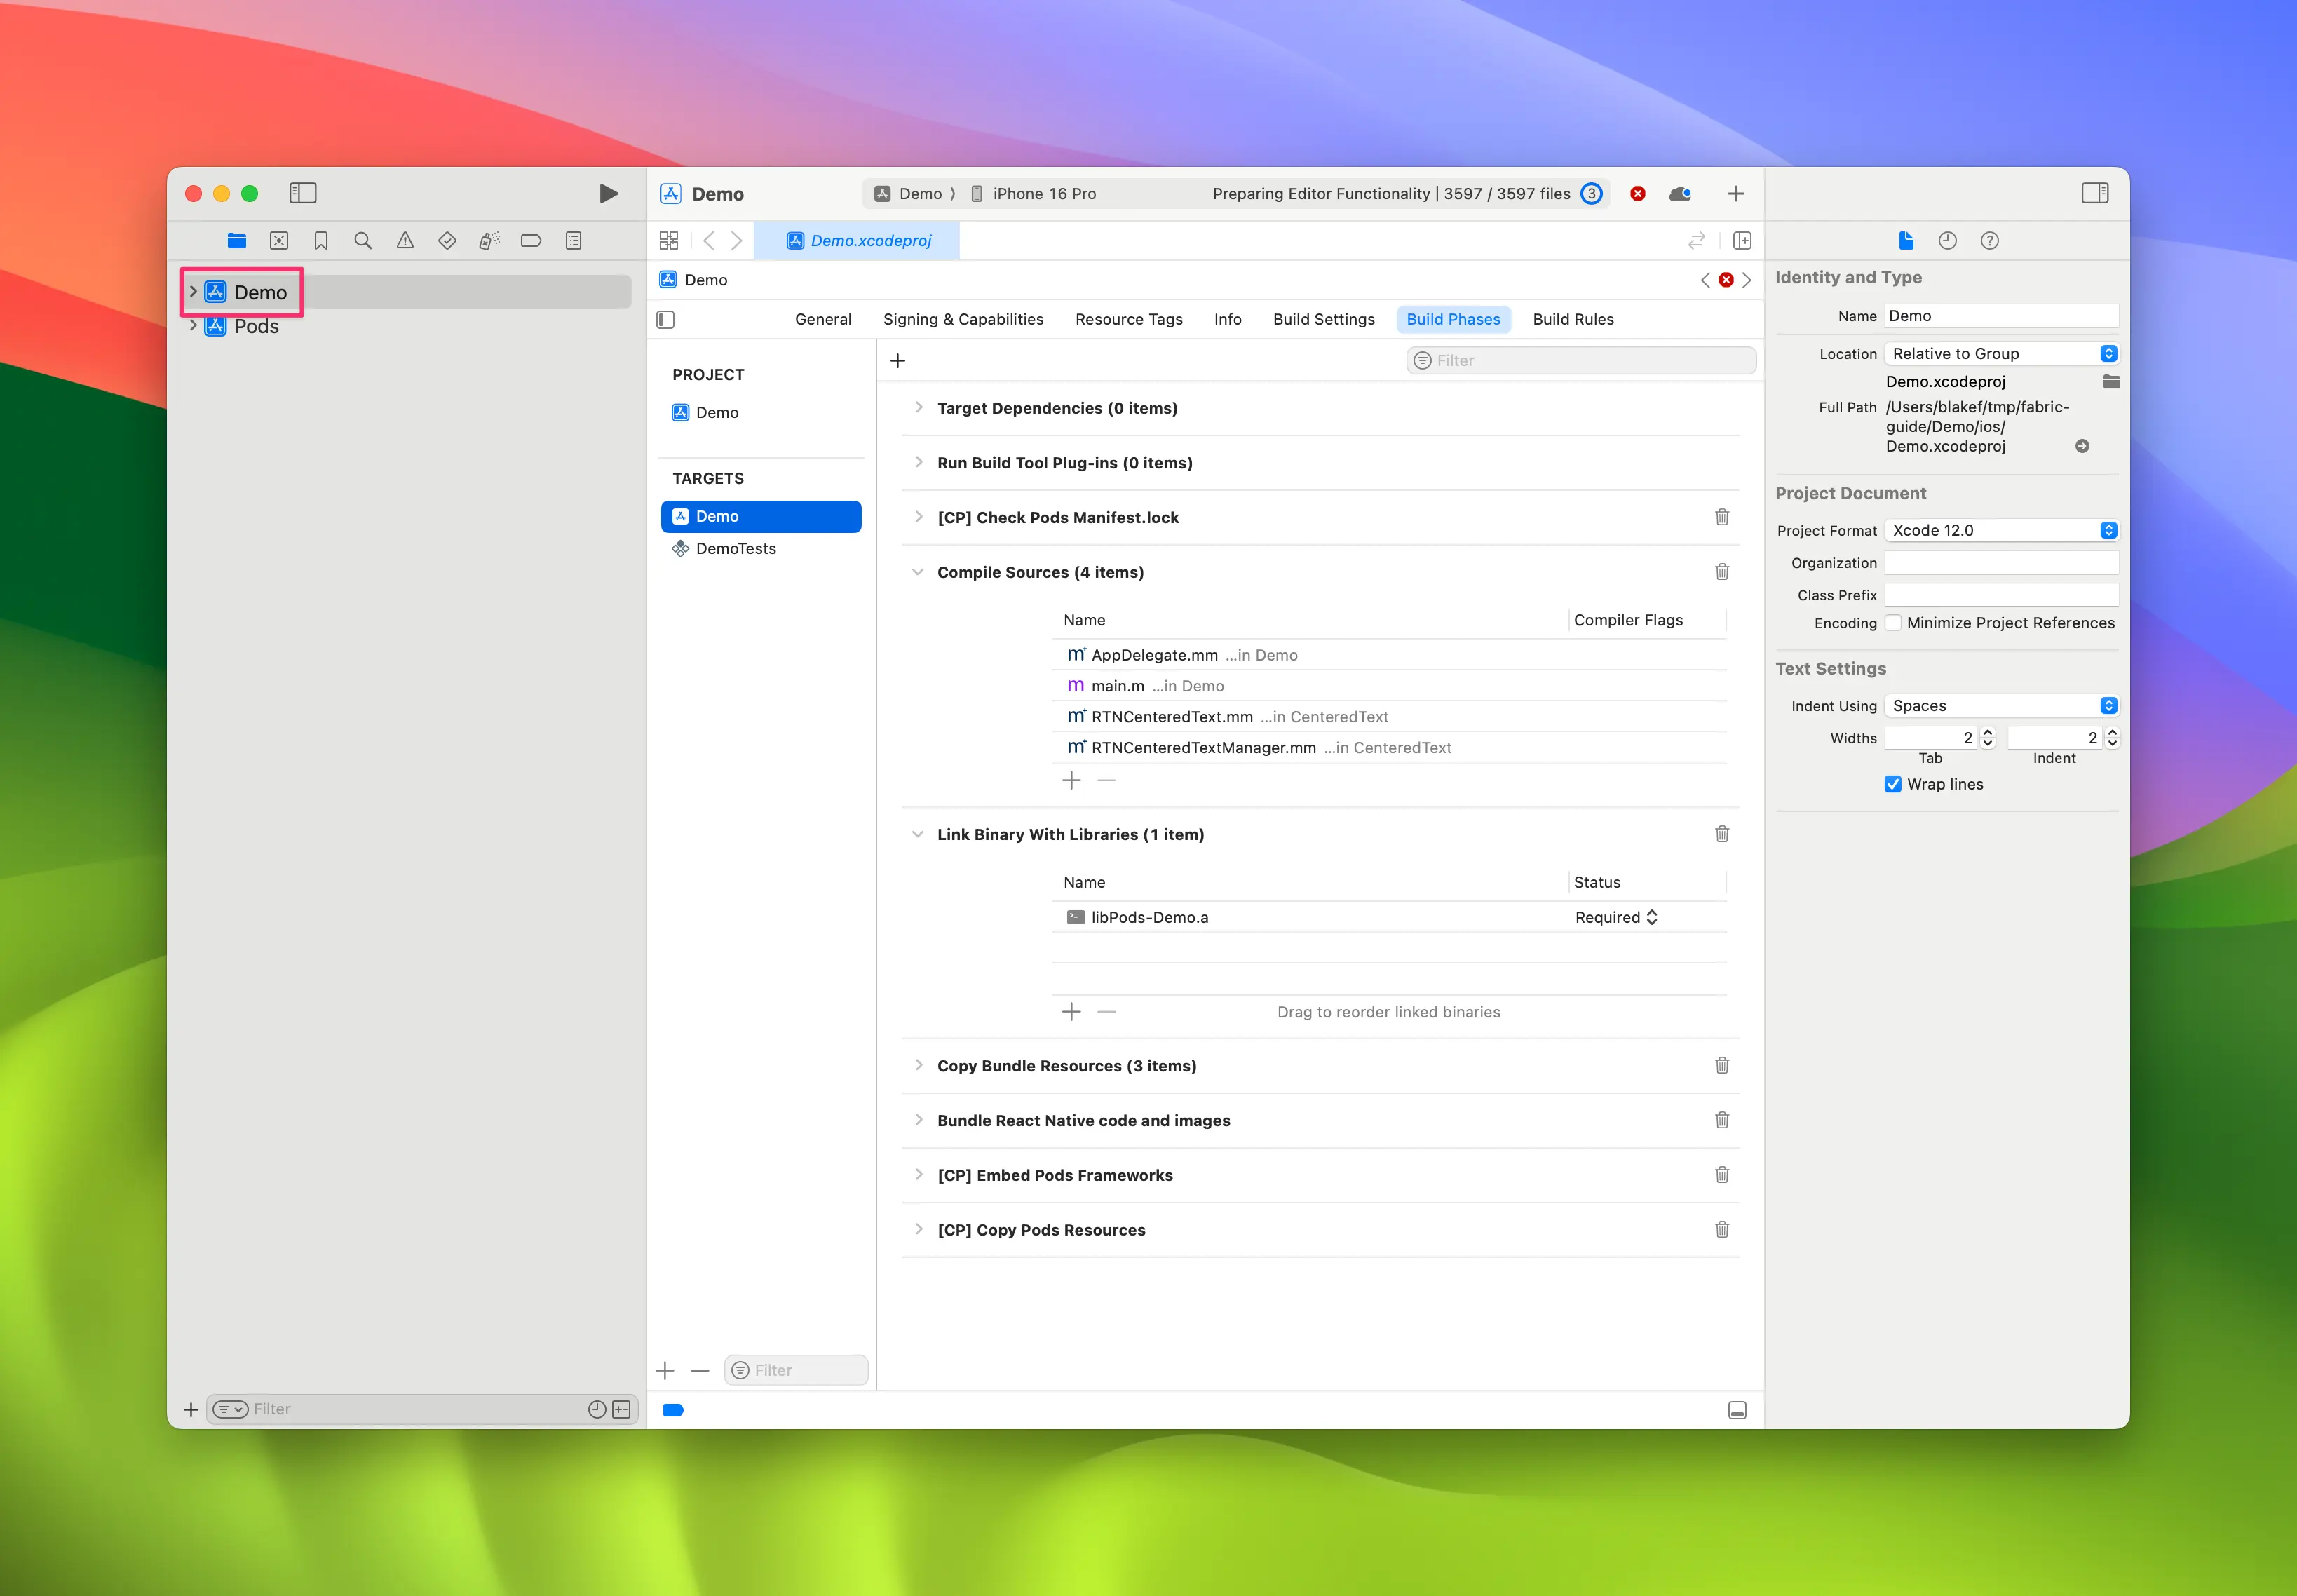
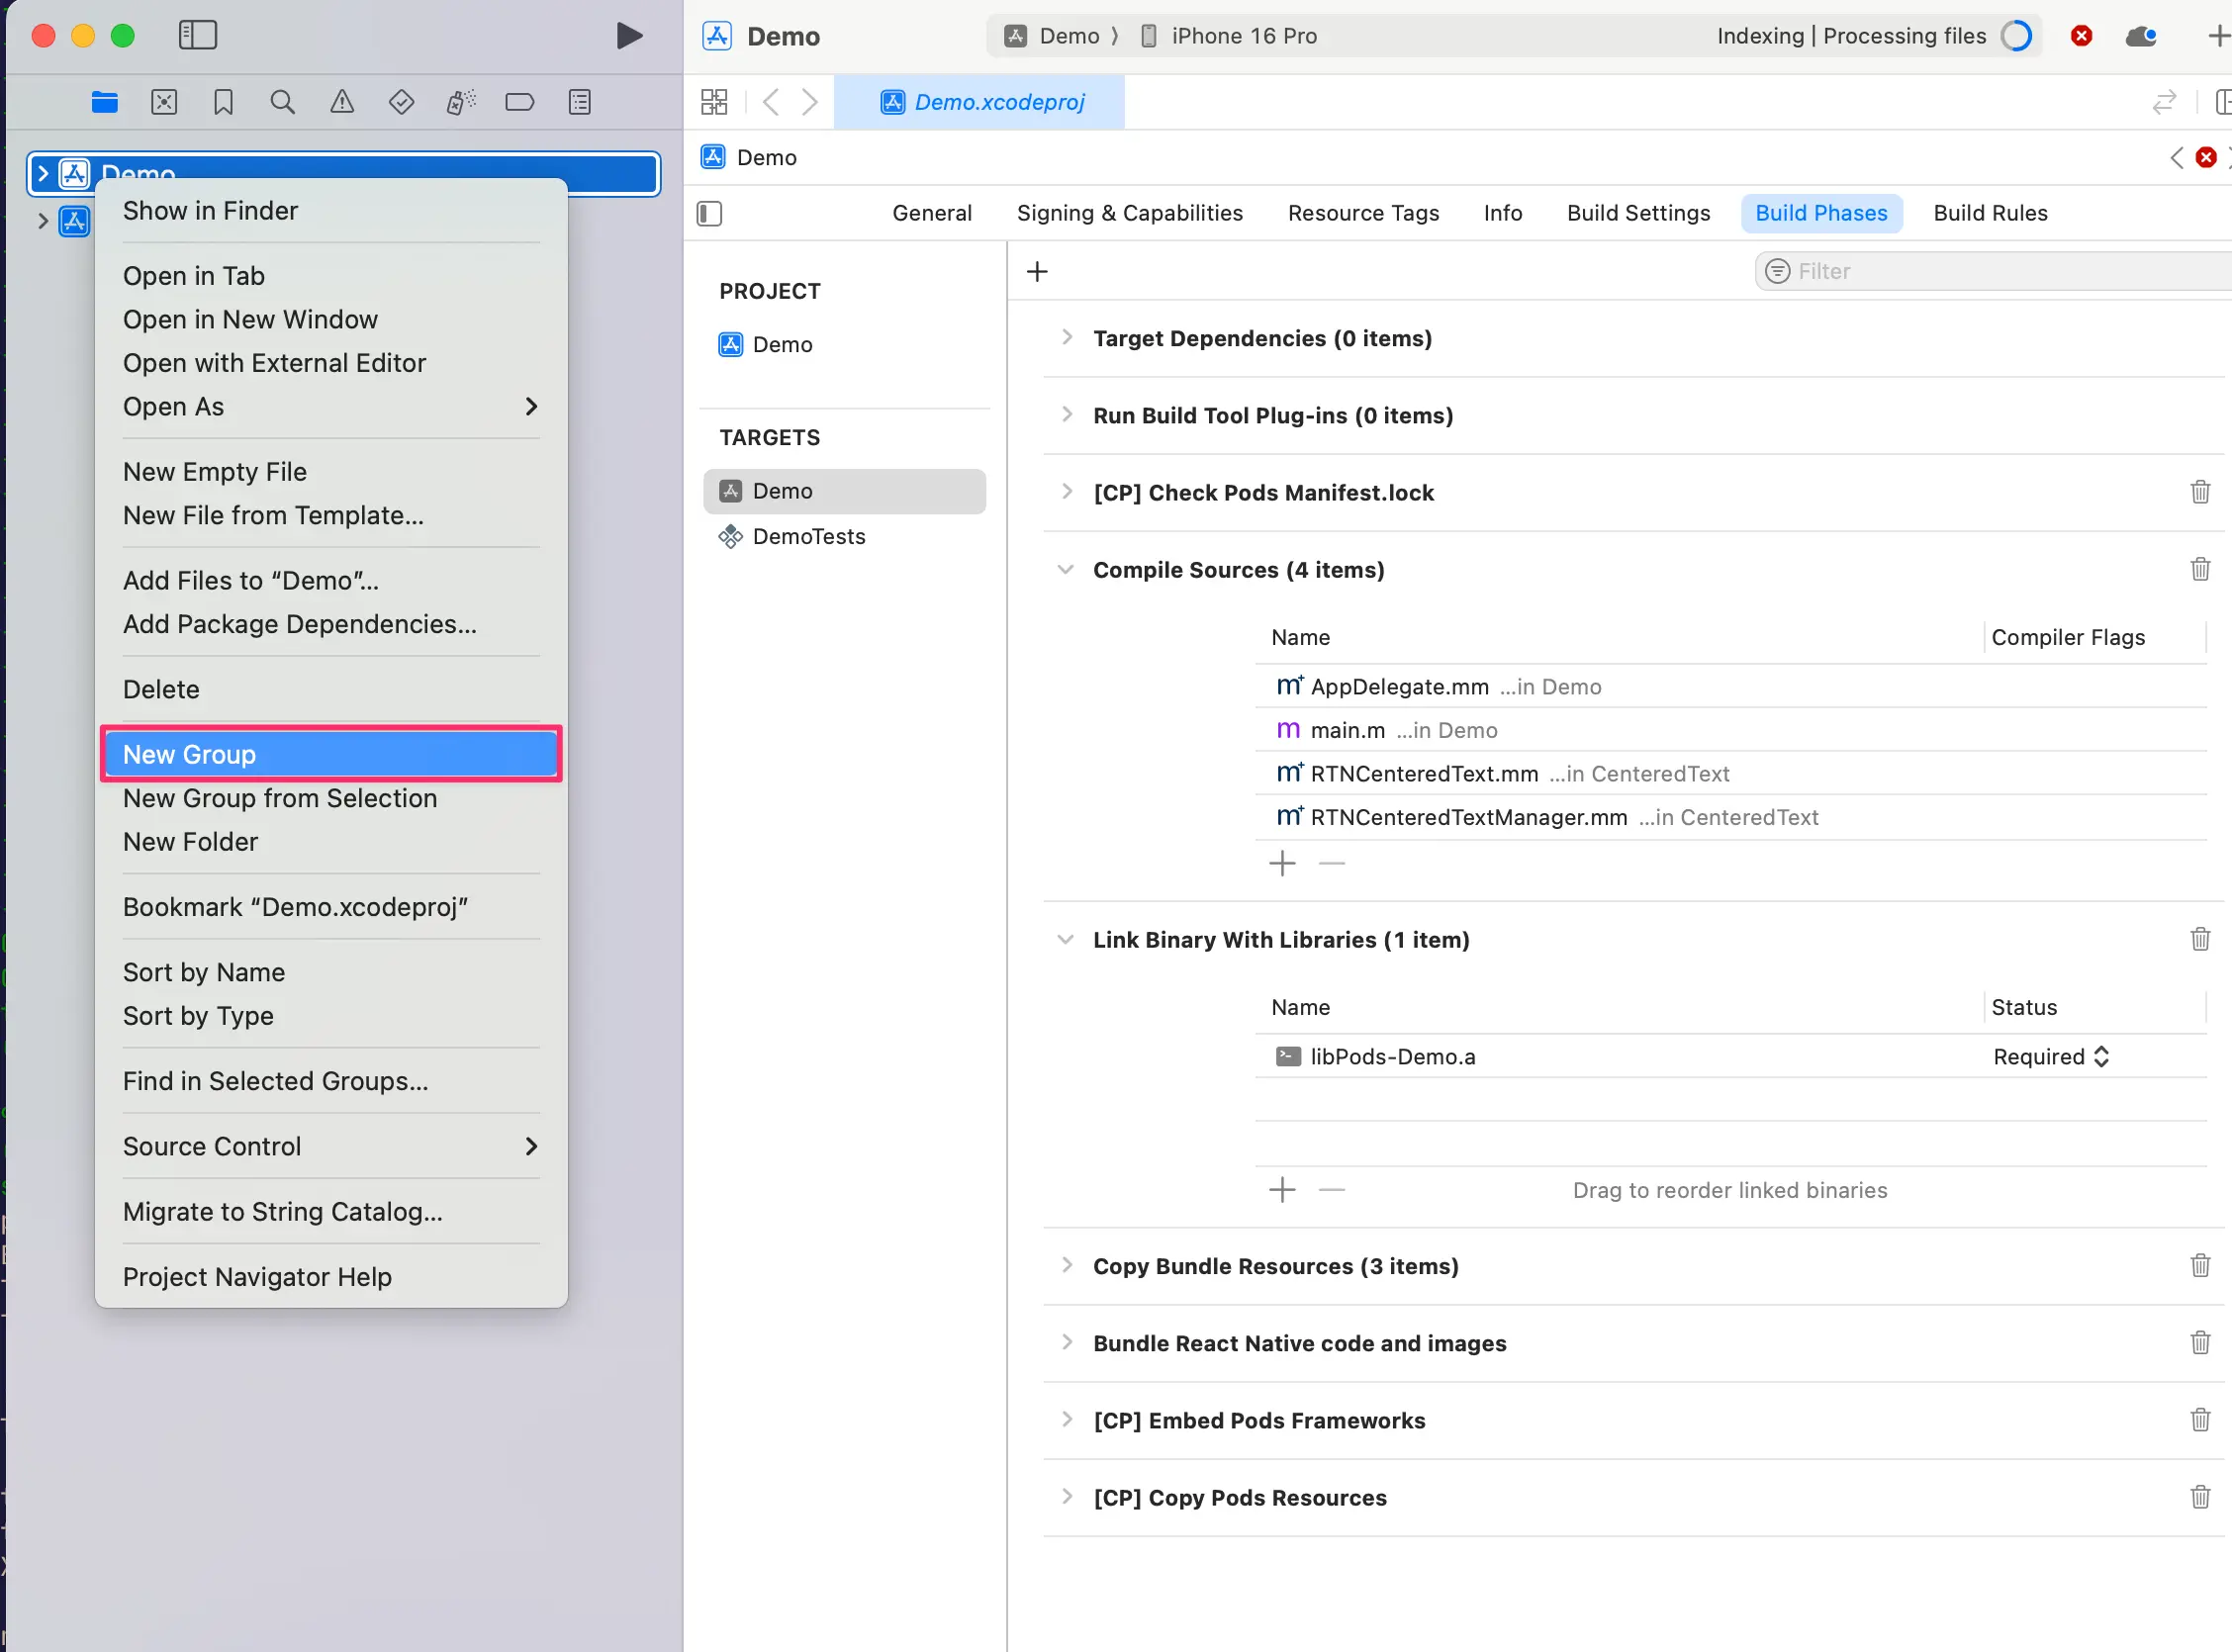
- Right click on app and select
New Group, call the new groupWebView.
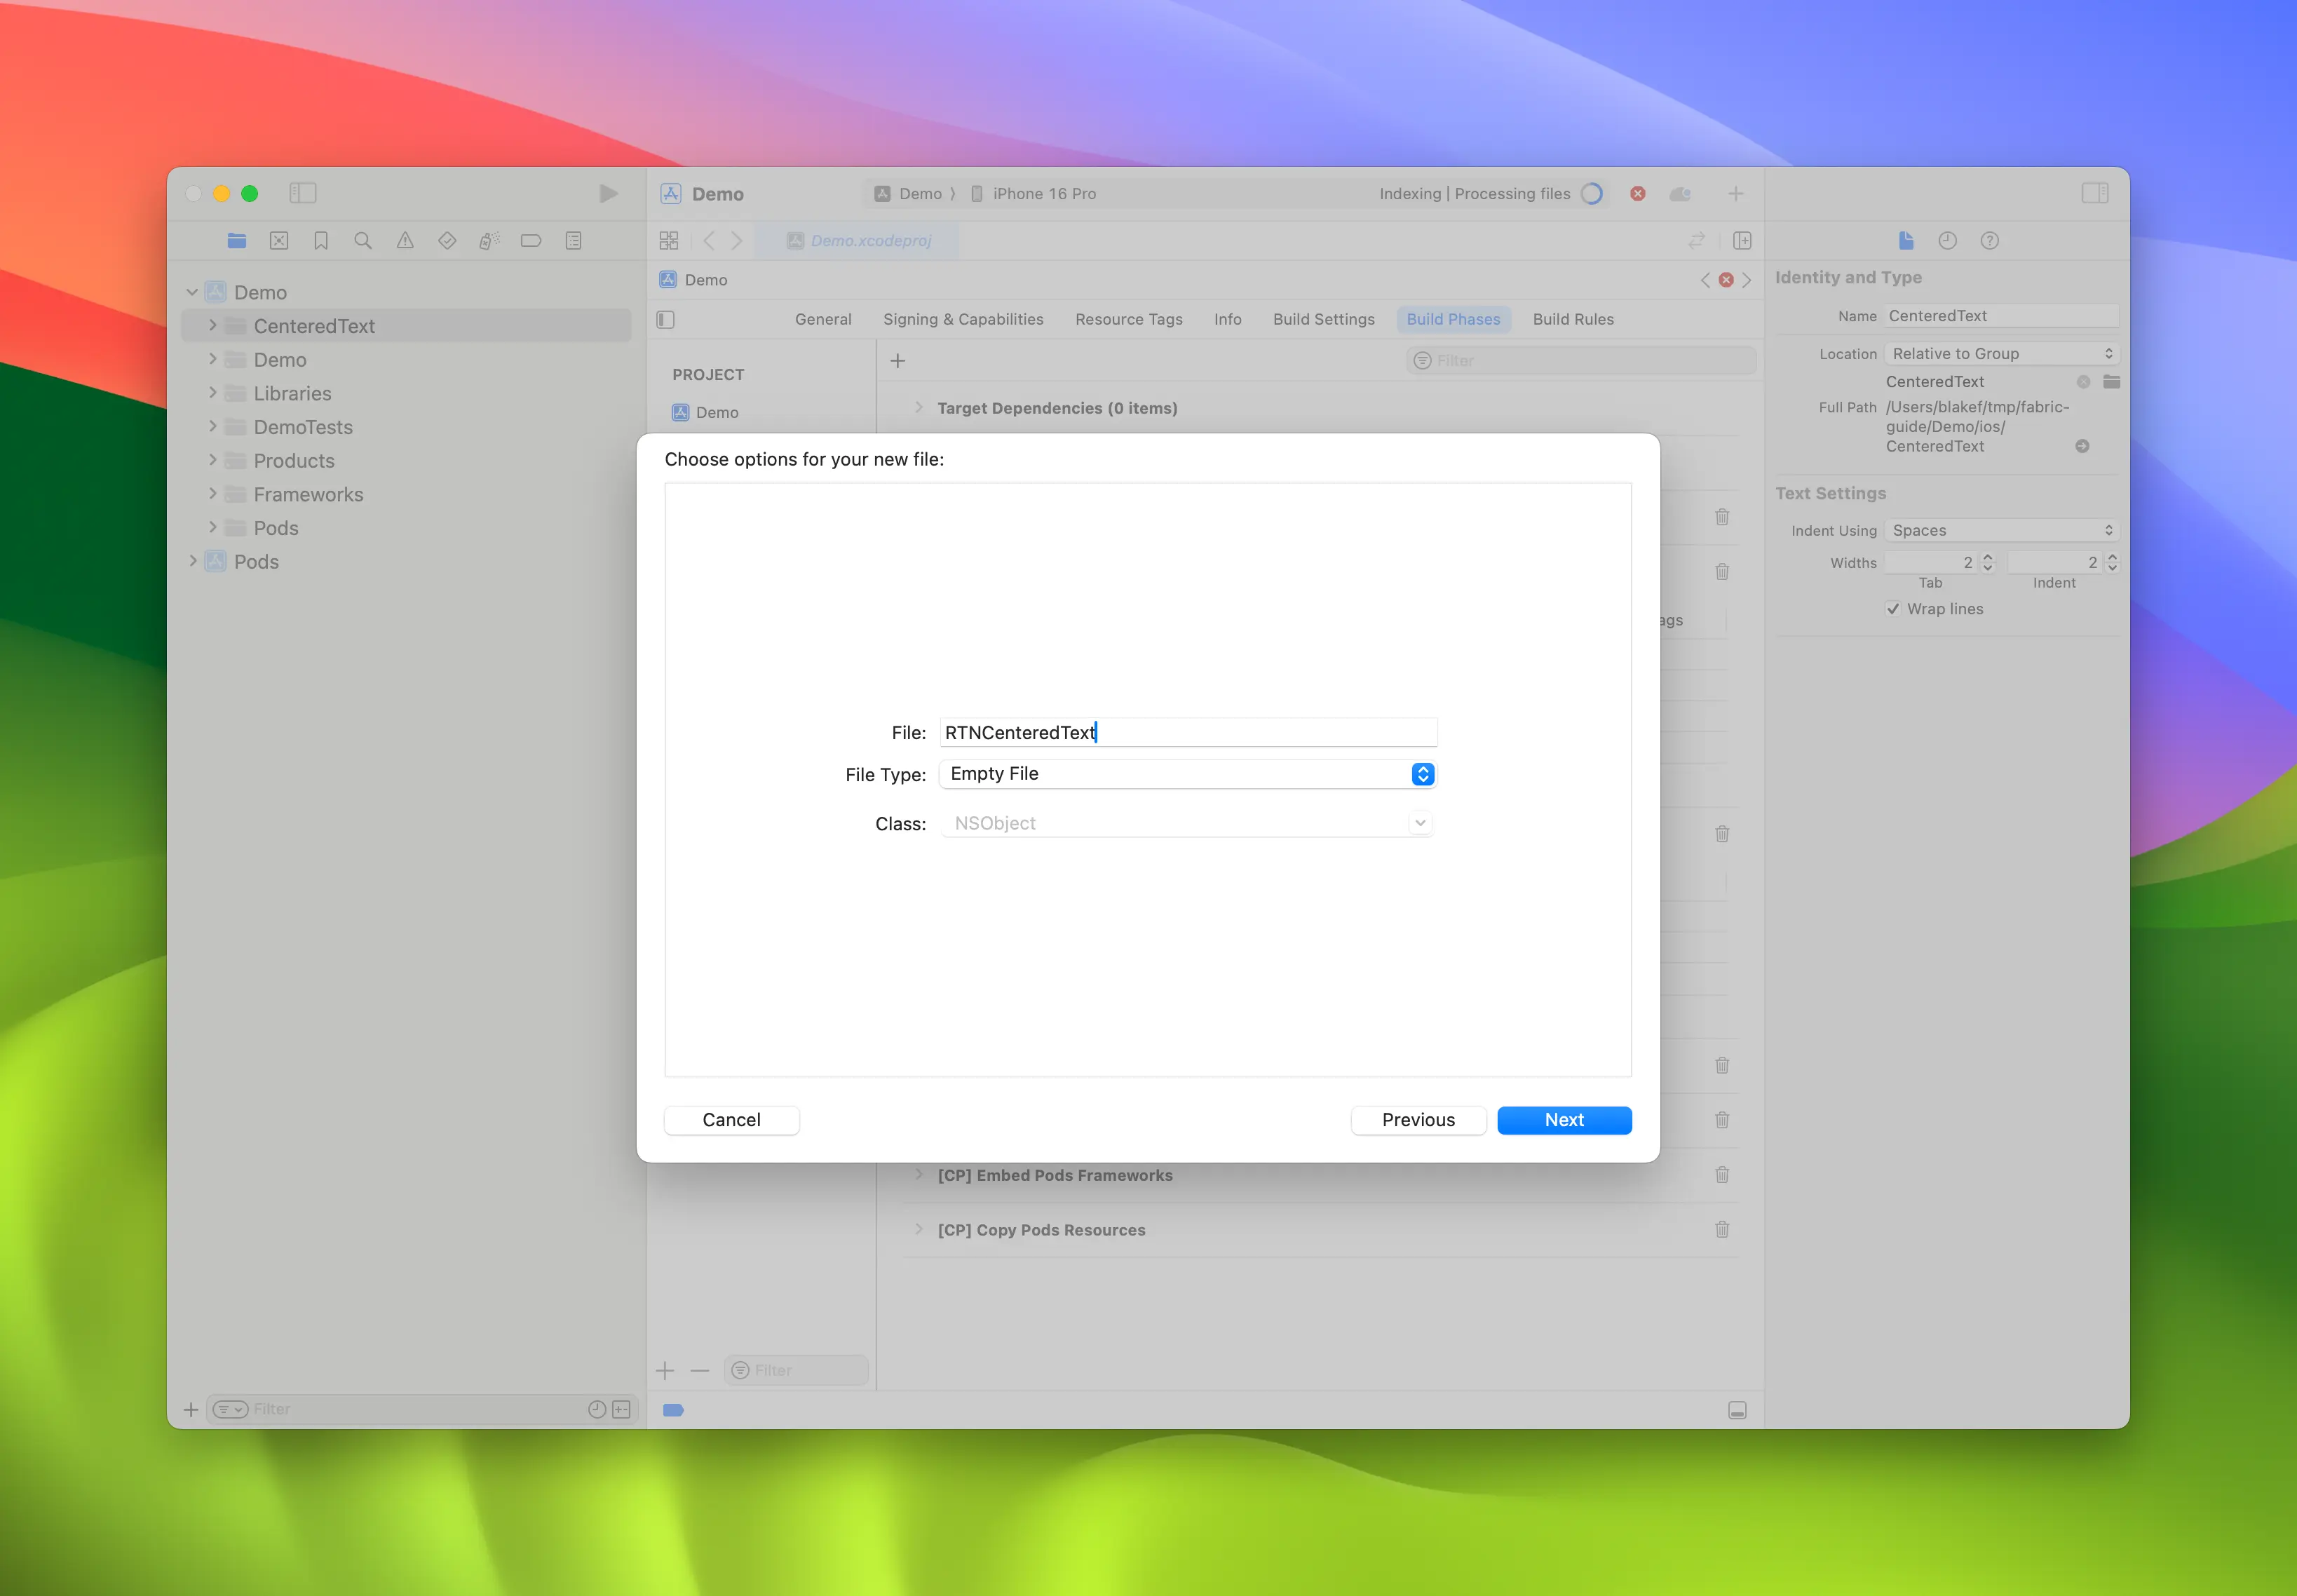
- In the
WebViewgroup, createNew→File from Template.
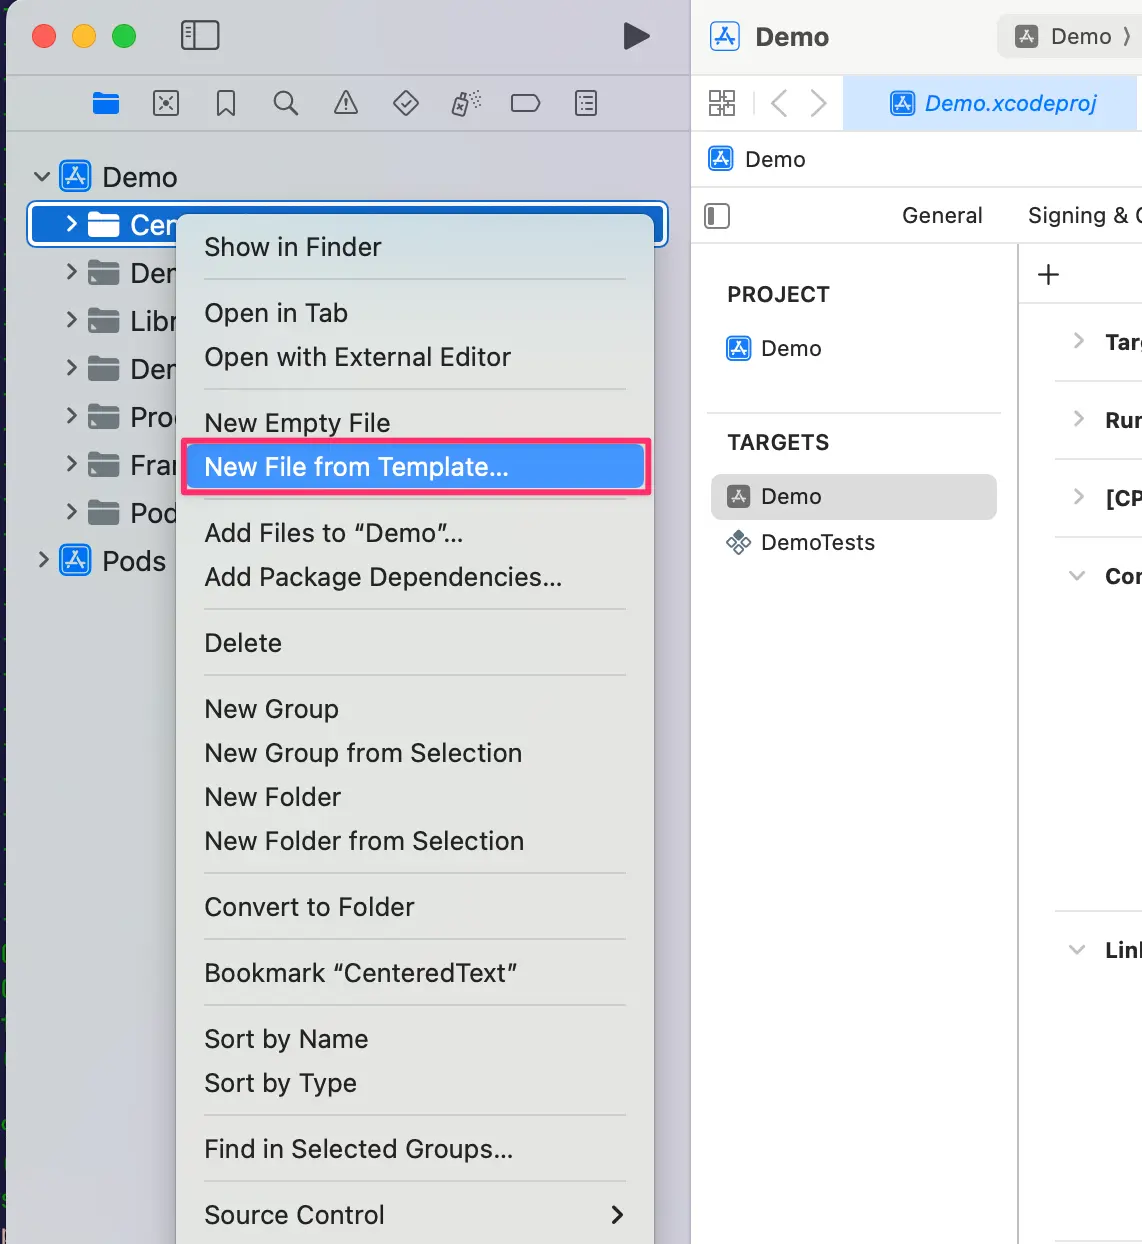
- Use the
Objective-C Filetemplate, and name itRCTWebView.
-
Repeat step 4 and create a header file named
RCTWebView.h. -
Rename
RCTWebView.m→RCTWebView.mmmaking it an Objective-C++ file.
Podfile
...
Demo
├── AppDelegate.swift
...
├── RCTWebView.h
└── RCTWebView.mm
After creating the header file and the implementation file, you can start implementing them.
This is the code for the RCTWebView.h file, which declares the component interface.
#import <React/RCTViewComponentView.h>
#import <UIKit/UIKit.h>

NS_ASSUME_NONNULL_BEGIN

@interface RCTWebView : RCTViewComponentView

// You would declare native methods you'd want to access from the view here

@end

NS_ASSUME_NONNULL_END
This class defines an RCTWebView which extends the RCTViewComponentView class. This is the base class for all the native components and it is provided by React Native.
The code for the implementation file (RCTWebView.mm) is the following:
#import "RCTWebView.h"

#import <react/renderer/components/AppSpec/ComponentDescriptors.h>
#import <react/renderer/components/AppSpec/EventEmitters.h>
#import <react/renderer/components/AppSpec/Props.h>
#import <react/renderer/components/AppSpec/RCTComponentViewHelpers.h>
#import <WebKit/WebKit.h>

using namespace facebook::react;

@interface RCTWebView () <RCTCustomWebViewViewProtocol, WKNavigationDelegate>
@end

@implementation RCTWebView {
  NSURL * _sourceURL;
  WKWebView * _webView;
}

-(instancetype)init
{
  if(self = [super init]) {
    _webView = [WKWebView new];
    _webView.navigationDelegate = self;
    [self addSubview:_webView];
  }
  return self;
}

- (void)updateProps:(Props::Shared const &)props oldProps:(Props::Shared const &)oldProps
{
  const auto &oldViewProps = *std::static_pointer_cast<CustomWebViewProps const>(_props);
  const auto &newViewProps = *std::static_pointer_cast<CustomWebViewProps const>(props);

  // Handle your props here
  if (oldViewProps.sourceURL != newViewProps.sourceURL) {
    NSString *urlString = [NSString stringWithCString:newViewProps.sourceURL.c_str() encoding:NSUTF8StringEncoding];
    _sourceURL = [NSURL URLWithString:urlString];
    if ([self urlIsValid:newViewProps.sourceURL]) {
      [_webView loadRequest:[NSURLRequest requestWithURL:_sourceURL]];
    }
  }

  [super updateProps:props oldProps:oldProps];
}

-(void)layoutSubviews
{
  [super layoutSubviews];
  _webView.frame = self.bounds;

}

#pragma mark - WKNavigationDelegate

-(void)webView:(WKWebView *)webView didFinishNavigation:(WKNavigation *)navigation
{
  CustomWebViewEventEmitter::OnScriptLoaded result = CustomWebViewEventEmitter::OnScriptLoaded{CustomWebViewEventEmitter::OnScriptLoadedResult::Success};
  self.eventEmitter.onScriptLoaded(result);
}

- (BOOL)urlIsValid:(std::string)propString
{
  if (propString.length() > 0 && !_sourceURL) {
    CustomWebViewEventEmitter::OnScriptLoaded result = CustomWebViewEventEmitter::OnScriptLoaded{CustomWebViewEventEmitter::OnScriptLoadedResult::Error};

    self.eventEmitter.onScriptLoaded(result);
    return NO;
  }
  return YES;
}

// Event emitter convenience method
- (const CustomWebViewEventEmitter &)eventEmitter
{
  return static_cast<const CustomWebViewEventEmitter &>(*_eventEmitter);
}

+ (ComponentDescriptorProvider)componentDescriptorProvider
{
  return concreteComponentDescriptorProvider<CustomWebViewComponentDescriptor>();
}

@end
This code is written in Objective-C++ and contains various details:
- the
@interfaceimplements two protocols:RCTCustomWebViewViewProtocol, generated by Codegen;WKNavigationDelegate, provided by the WebKit framework to handle the web view navigation events;
- the
initmethod that instantiates theWKWebView, adds it to the subviews and that sets thenavigationDelegate; - the
updatePropsmethod that is called by React Native when the component's props change; - the
layoutSubviewsmethod that describes how the custom view needs to be laid out; - the
webView:didFinishNavigation:method that lets you handle what to do when theWKWebViewfinishes loading the page; - the
urlIsValid:(std::string)propStringmethod that checks whether the URL received as prop is valid; - the
eventEmittermethod which is a utility to retrieve a strongly typedeventEmitterinstance - the
componentDescriptorProviderwhich returns theComponentDescriptorgenerated by Codegen;
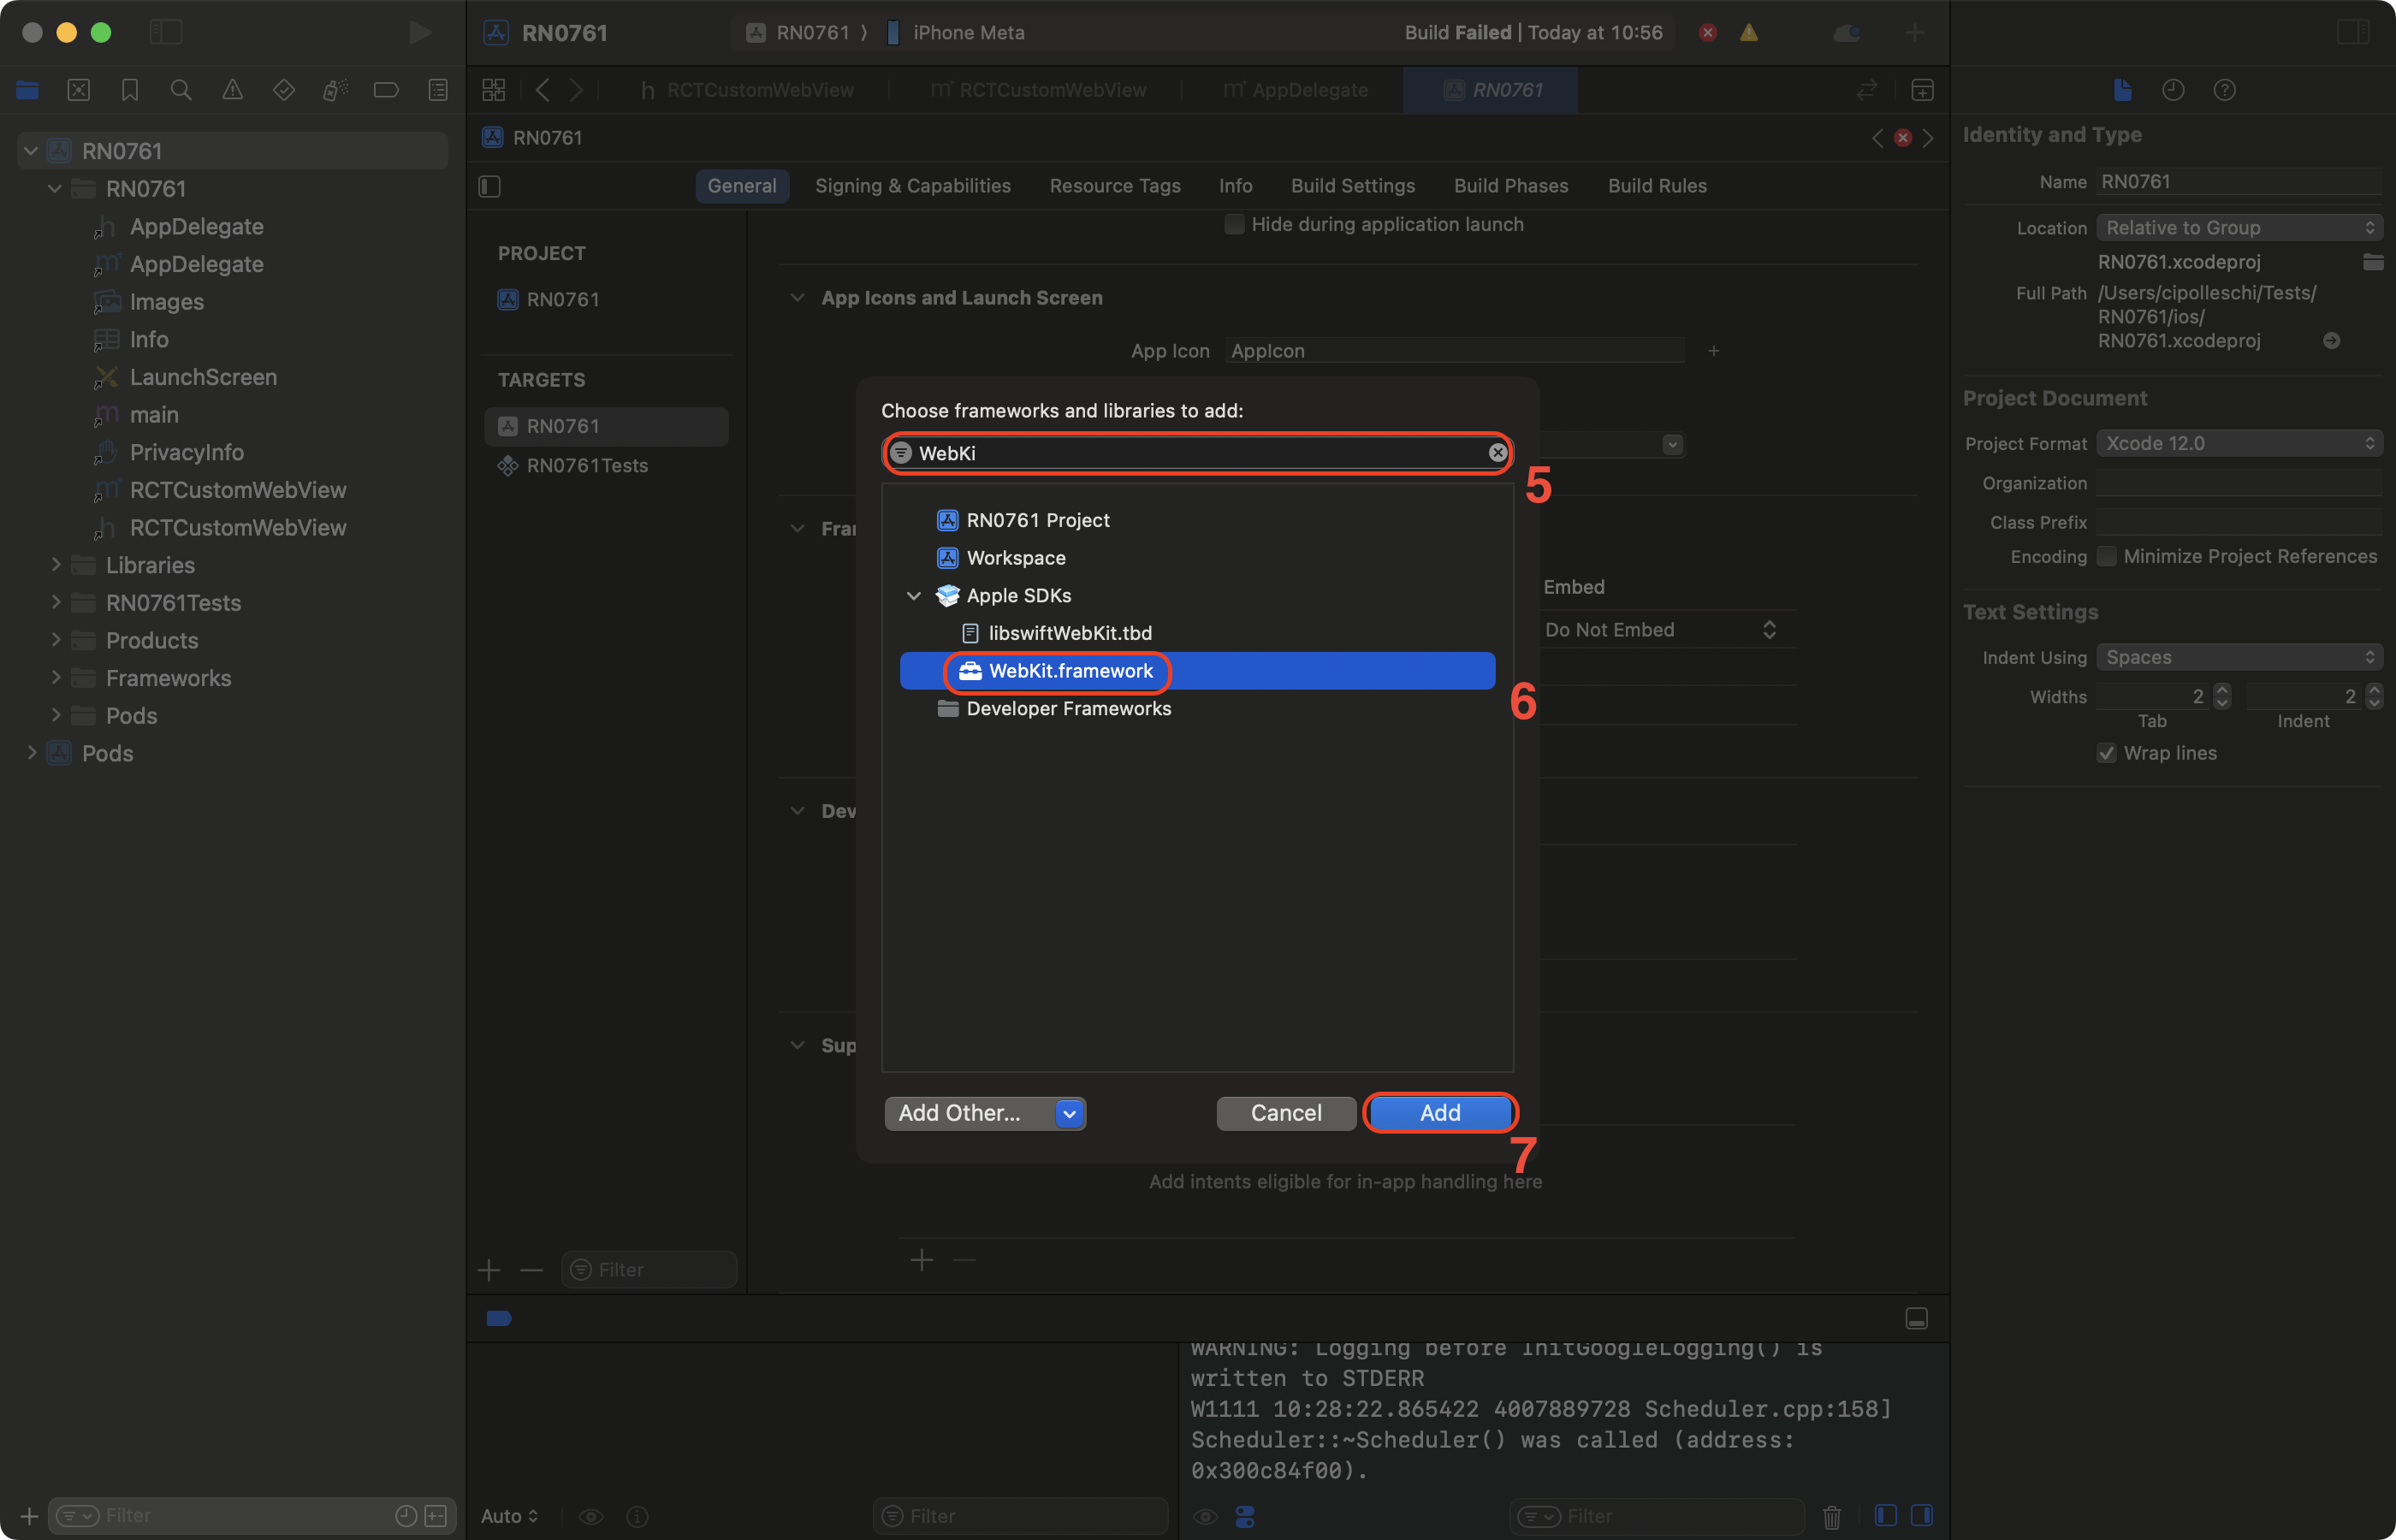
Add WebKit framework
This step is only required because we are creating a Web view. Web components on iOS needs to be linked against the WebKit framework provided by Apple. If your component doesn't need to access web-specific features, you can skip this step.
A web view requires access to some features that Apple provides through one of the frameworks shipped with Xcode and the devices: WebKit.
You can see it in the native code by the #import <WebKit/WebKit.h> line added in the RCTWebView.mm.
To link the WebKit framework in your app, follow these steps:
- In Xcode, Click on your project
- Select the app target
- Select the General tab
- Scroll down until you find the "Frameworks, Libraries, and Embedded Contents" section, and press the
+button
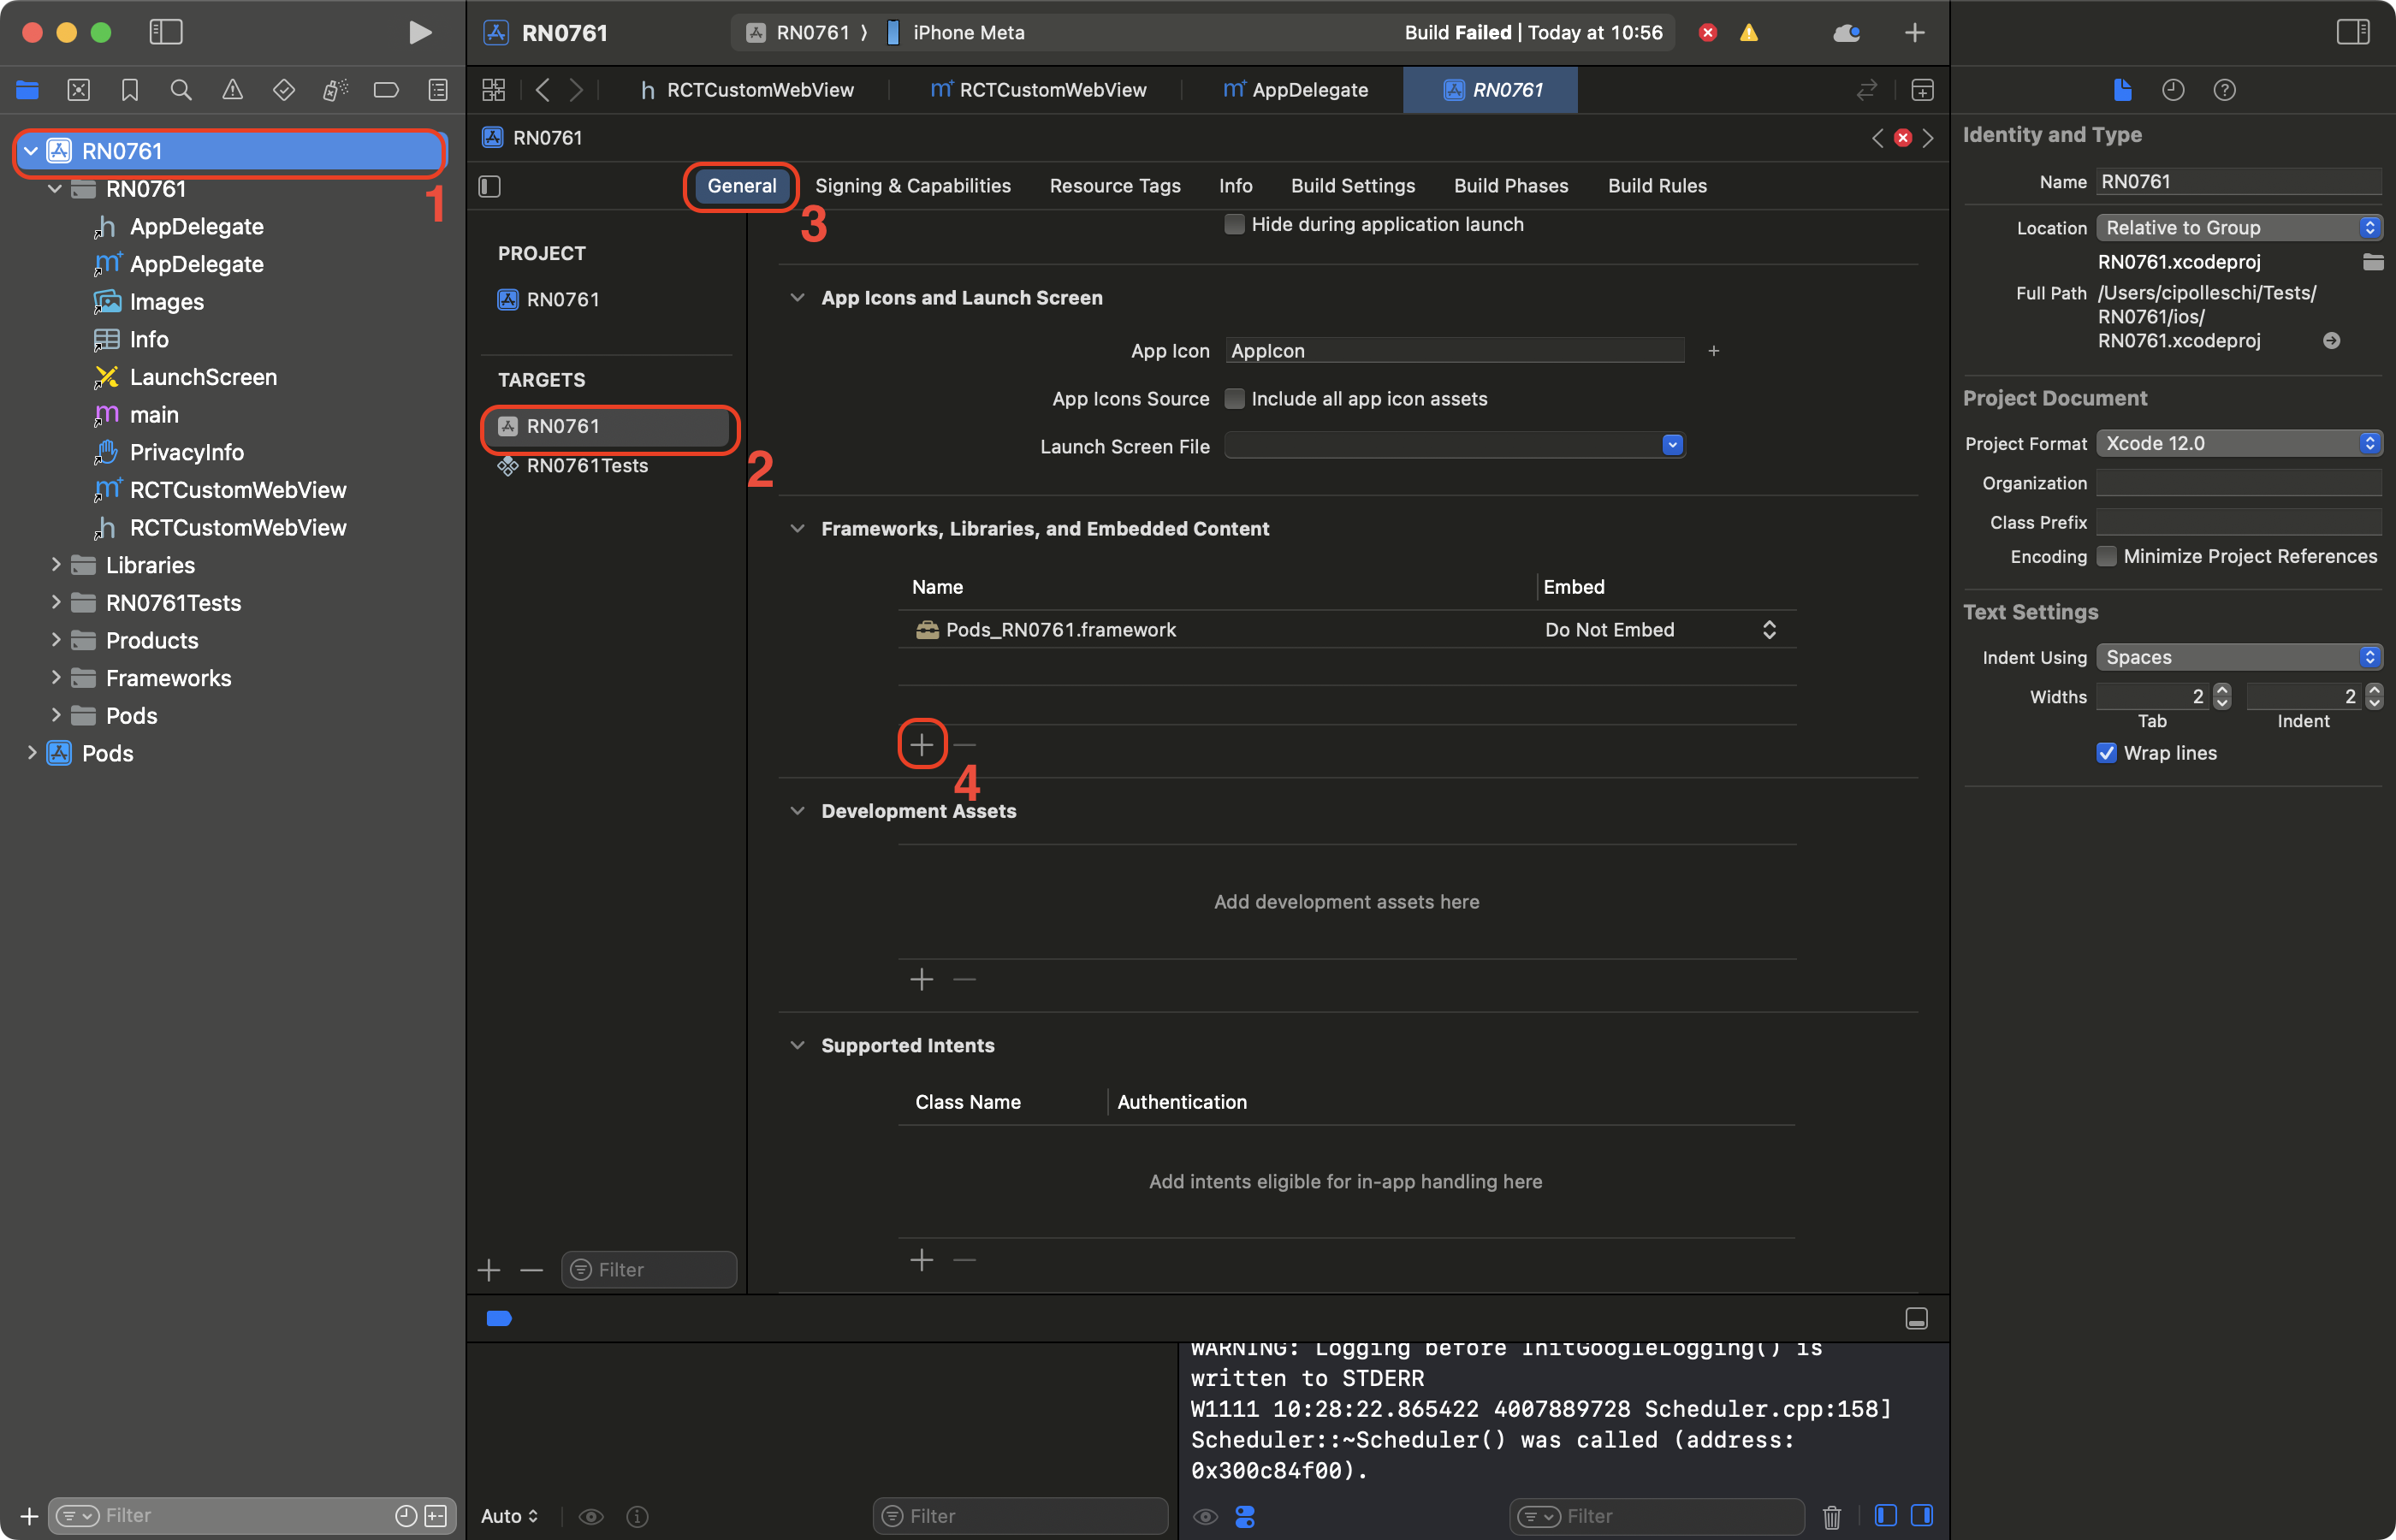
- In the search bar, filter for WebKit
- Select the WebKit framework
- Click on Add.