About the New Architecture
Since 2018, the React Native team has been redesigning the core internals of React Native to enable developers to create higher-quality experiences. As of 2024, this version of React Native has been proven at scale and powers production apps by Meta.
The term New Architecture refers to both the new framework architecture and the work to bring it to open source.
The New Architecture has been available for experimental opt-in as of React Native 0.68 with continued improvements in every subsequent release. The team is now working to make this the default experience for the React Native open source ecosystem.
Why a New Architecture?
After many years of building with React Native, the team identified a set of limitations that prevented developers from crafting certain experiences with a high polish. These limitations were fundamental to the existing design of the framework, so the New Architecture started as an investment in the future of React Native.
The New Architecture unlocks capabilities and improvements that were impossible in the legacy architecture.
Synchronous Layout and Effects
Building adaptive UI experiences often requires measuring the size and position of your views and adjusting layout.
Today, you would use the onLayout event to get the layout information of a view and make any adjustments. However, state updates within the onLayout callback may apply after painting the previous render. This means that users may see intermediate states or visual jumps between rendering the initial layout and responding to layout measurements.
With the New Architecture, we can avoid this issue entirely with synchronous access to layout information and properly scheduled updates such that no intermediate state is visible to users.
Example: Rendering a Tooltip
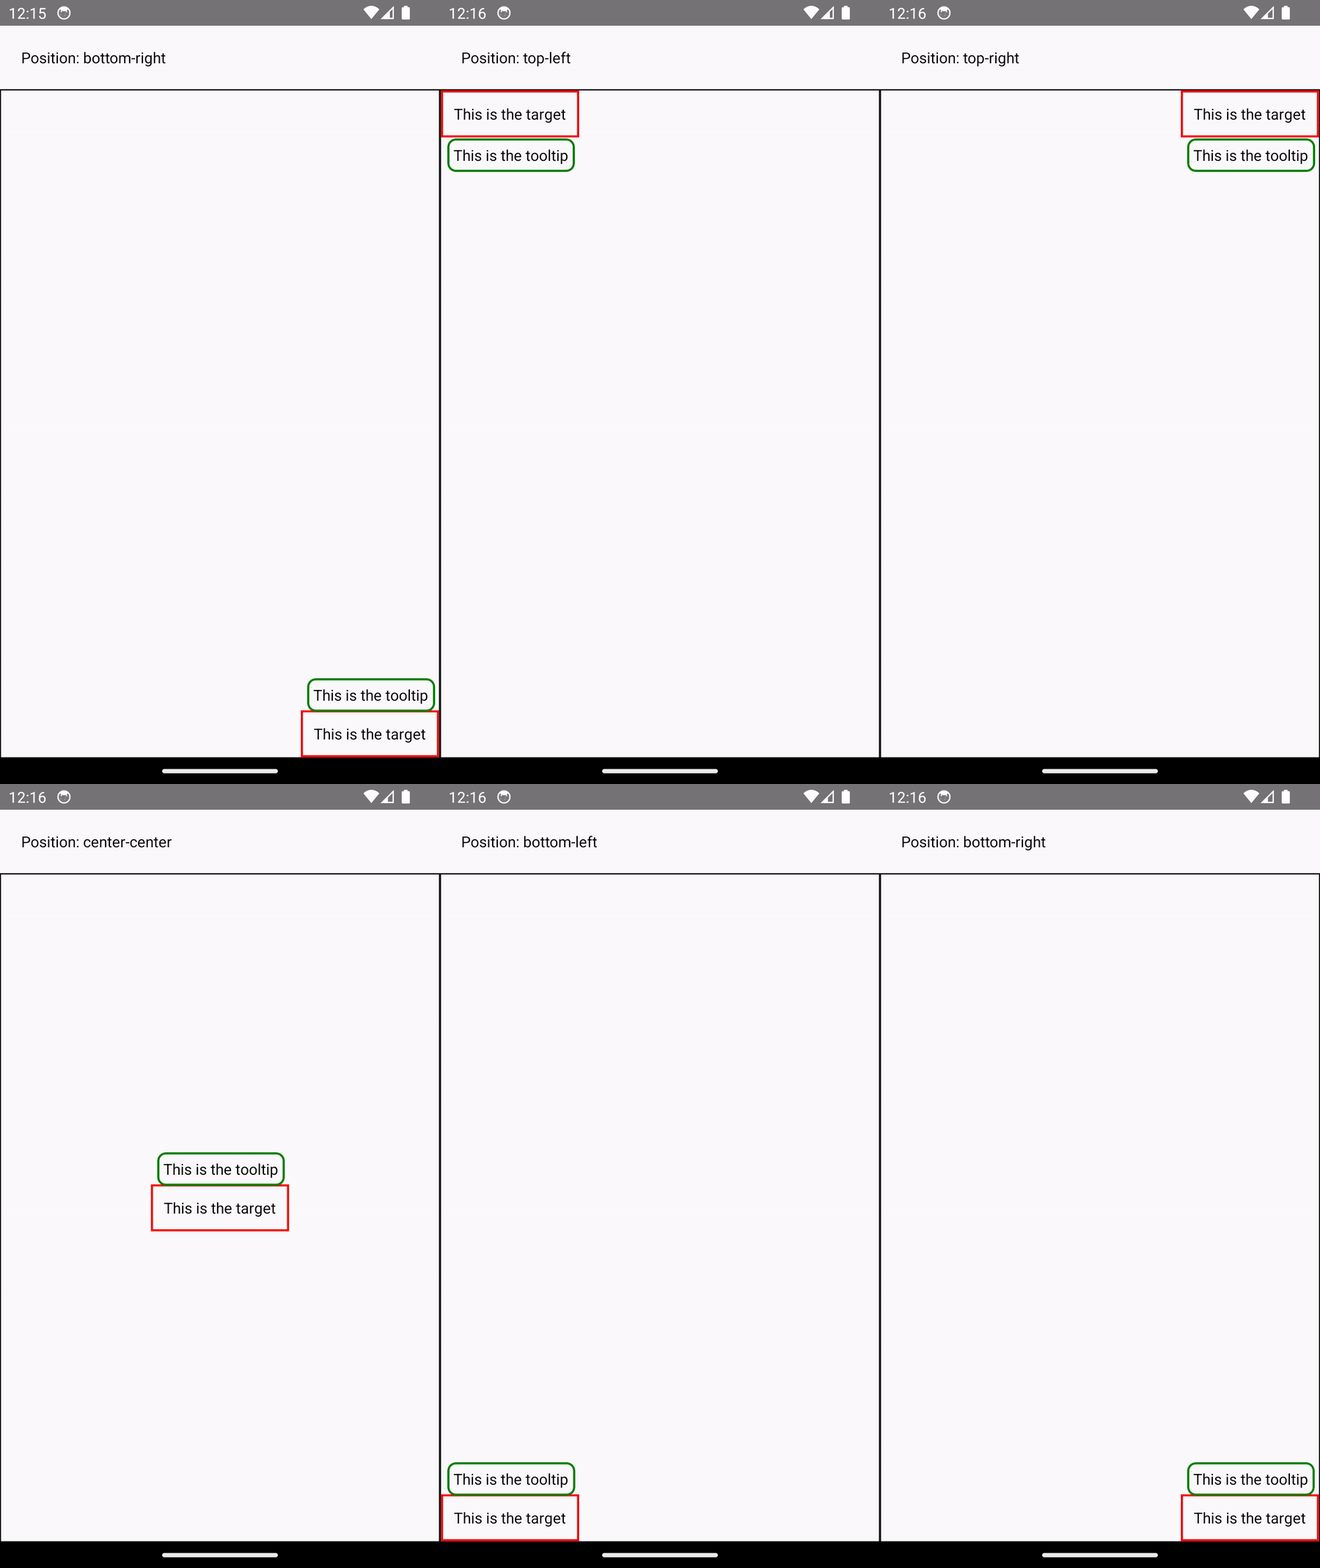
Measuring and placing a tooltip above a view allows us to showcase what synchronous rendering unlocks. The tooltip needs to know the position of its target view to determine where it should render.
In the current architecture, we use onLayout to get the measurements of the view and then update the positioning of the tooltip based on where the view is.
function ViewWithTooltip() {
  // ...

  // We get the layout information and pass to ToolTip to position itself
  const onLayout = React.useCallback(event => {
    targetRef.current?.measureInWindow((x, y, width, height) => {
      // This state update is not guaranteed to run in the same commit
      // This results in a visual "jump" as the ToolTip repositions itself
      setTargetRect({x, y, width, height});
    });
  }, []);

  return (
    <>
      <View ref={targetRef} onLayout={onLayout}>
        <Text>Some content that renders a tooltip above</Text>
      </View>
      <Tooltip targetRect={targetRect} />
    </>
  );
}
With the New Architecture, we can use useLayoutEffect to synchronously measure and apply layout updates in a single commit, avoiding the visual "jump".
function ViewWithTooltip() {
  // ...

  useLayoutEffect(() => {
    // The measurement and state update for `targetRect` happens in a single commit
    // allowing ToolTip to position itself without intermediate paints
    targetRef.current?.measureInWindow((x, y, width, height) => {
      setTargetRect({x, y, width, height});
    });
  }, [setTargetRect]);

  return (
    <>
      <View ref={targetRef}>
        <Text>Some content that renders a tooltip above</Text>
      </View>
      <Tooltip targetRect={targetRect} />
    </>
  );
}
Support for Concurrent Renderer and Features
The New Architecture supports concurrent rendering and features that have shipped in React 18 and beyond. You can now use features like Suspense for data-fetching, Transitions, and other new React APIs in your React Native code, further conforming codebases and concepts between web and native React development.
The concurrent renderer also brings out-of-the-box improvements like automatic batching, which reduces re-renders in React.
Example: Automatic Batching
With the New Architecture, you'll get automatic batching with the React 18 renderer.
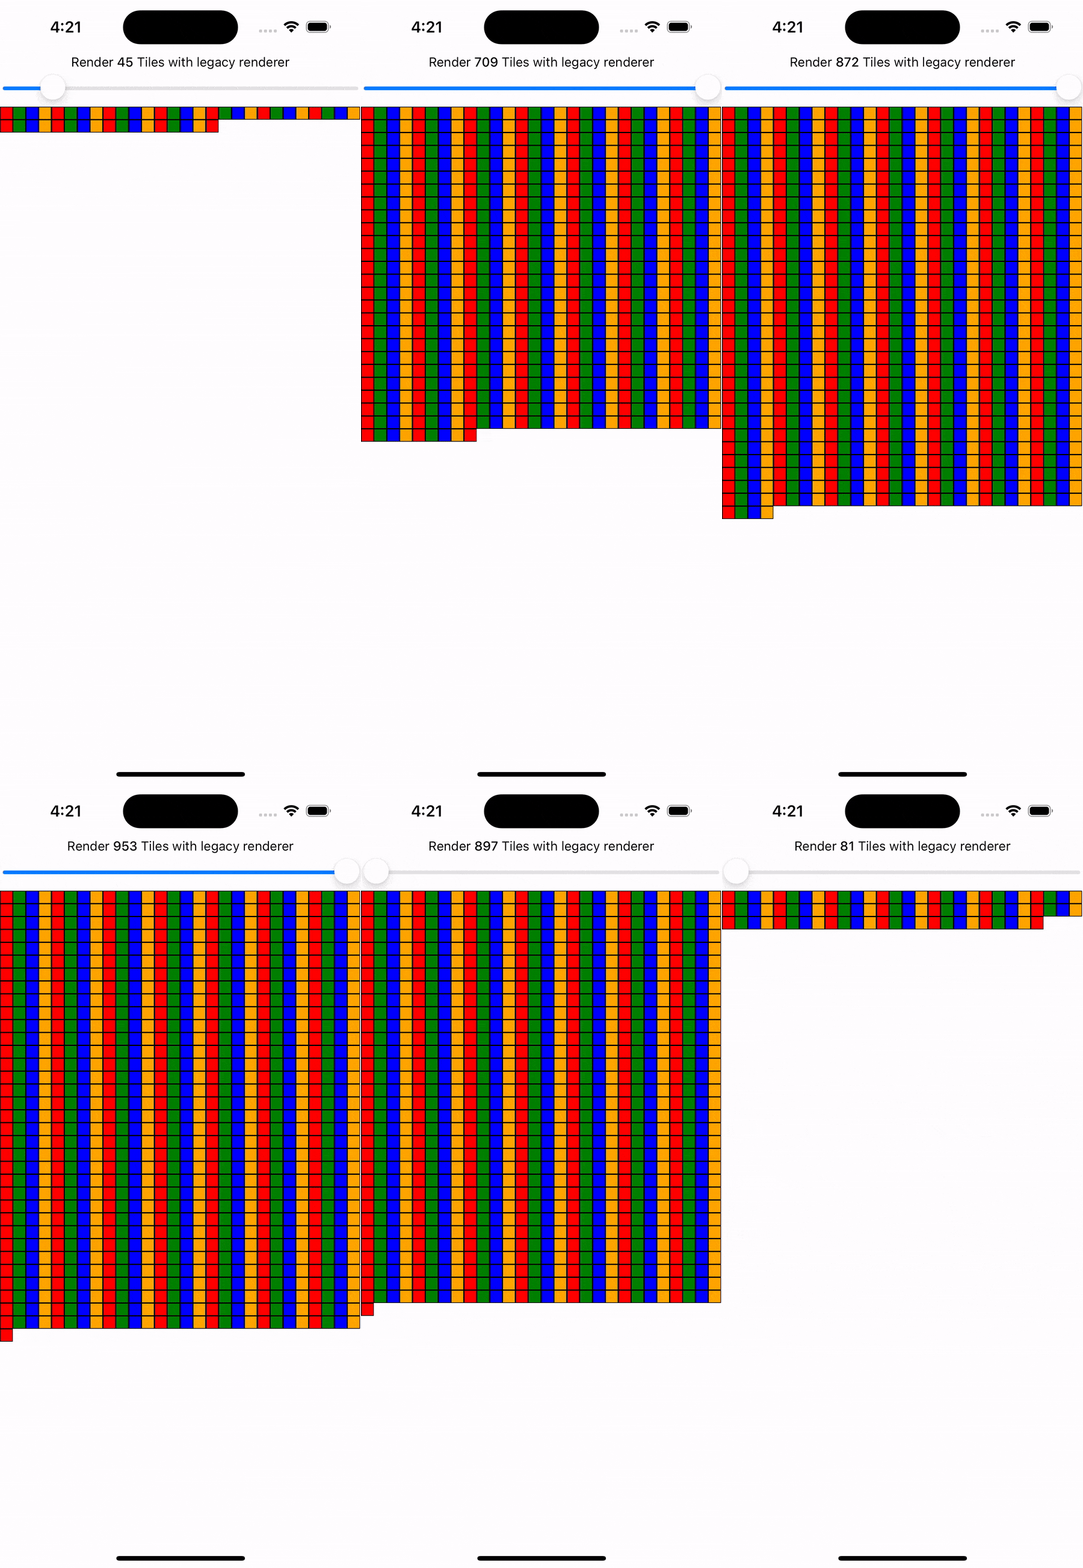
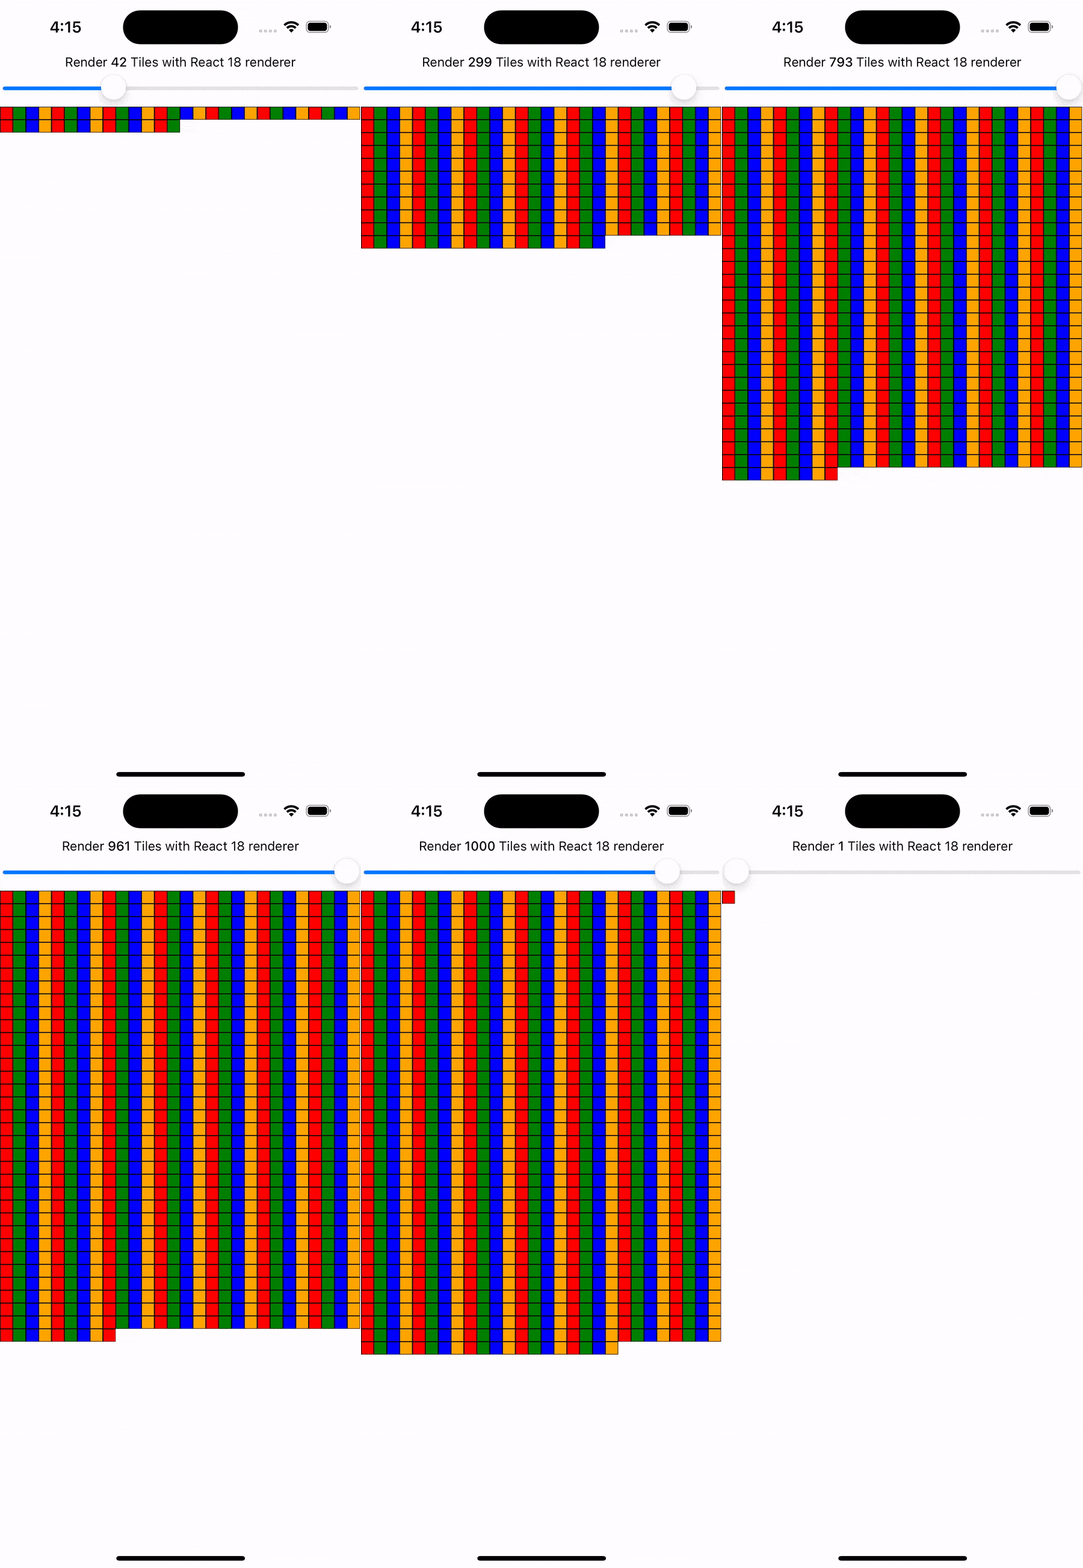
In this example, a slider specifies how many tiles to render. Dragging the slider from 0 to 1000 will fire off a quick succession of state updates and re-renders.
In comparing the renderers for the same code, you can visually notice the renderer provides a smoother UI, with less intermediate UI updates. State updates from native event handlers, like this native Slider component, are now batched.


New concurrent features, like Transitions, give you the power to express the priority of UI updates. Marking an update as lower priority tells React it can "interrupt" rendering the update to handle higher priority updates to ensure a responsive user experience where it matters.
Example: Using startTransition
We can build on the previous example to showcase how transitions can interrupt in-progress rendering to handle a newer state update.
We wrap the tile number state update with startTransition to indicate that rendering the tiles can be interrupted. startTransition also provides a isPending flag to tell us when the transition is complete.
function TileSlider({value, onValueChange}) {
  const [isPending, startTransition] = useTransition();

  return (
    <>
      <View>
        <Text>
          Render {value} Tiles
        </Text>
        <ActivityIndicator animating={isPending} />
      </View>
      <Slider
        value={1}
        minimumValue={1}
        maximumValue={1000}
        step={1}
        onValueChange={newValue => {
          startTransition(() => {
            onValueChange(newValue);
          });
        }}
      />
    </>
  );
}

function ManyTiles() {
  const [value, setValue] = useState(1);
  const tiles = generateTileViews(value);
  return (
      <TileSlider onValueChange={setValue} value={value} />
      <View>
        {tiles}
      </View>
  )
}
You'll notice that with the frequent updates in a transition, React renders fewer intermediate states because it bails out of rendering the state as soon as it becomes stale. In comparison, without transitions, more intermediate states are rendered. Both examples still use automatic batching. Still, transitions give even more power to developers to batch in-progress renders.
Fast JavaScript/Native Interfacing
The New Architecture removes the asynchronous bridge between JavaScript and native and replaces it with JavaScript Interface (JSI). JSI is an interface that allows JavaScript to hold a reference to a C++ object and vice-versa. With a memory reference, you can directly invoke methods without serialization costs.
JSI enables VisionCamera, a popular camera library for React Native, to process frames in real time. Typical frame buffers are 10 MB, which amounts to roughly 1 GB of data per second, depending on the frame rate. In comparison with the serialization costs of the bridge, JSI handles that amount of interfacing data with ease. JSI can expose other complex instance-based types such as databases, images, audio samples, etc.
JSI adoption in the New Architecture removes this class of serialization work from all native-JavaScript interop. This includes initializing and re-rendering native core components like View and Text. You can read more about our investigation in rendering performance in the New Architecture and the improved benchmarks we measured.
What can I expect from enabling the New Architecture?
While the New Architecture enables these features and improvements, enabling the New Architecture for your app or library may not immediately improve the performance or user experience.
For example, your code may need refactoring to leverage new capabilities like synchronous layout effects or concurrent features. Although JSI will minimize the overhead between JavaScript and native memory, data serialization may not have been a bottleneck for your app's performance.
Enabling the New Architecture in your app or library is opting into the future of React Native.
The team is actively researching and developing new capabilities the New Architecture unlocks. For example, web alignment is an active area of exploration at Meta that will ship to the React Native open source ecosystem.
You can follow along and contribute in our dedicated discussions & proposals repository.
Should I use the New Architecture today?
With 0.76, The New Architecture is enabled by default in all the React Native projects.
If you find anything that is not working well, please open an issue using this template.
If, for any reasons, you can't use the New Architecture, you can still opt-out from it:
Android
- Open the
android/gradle.propertiesfile - Toggle the
newArchEnabledflag fromtruetofalse
# Use this property to enable support to the new architecture.
# This will allow you to use TurboModules and the Fabric render in
# your application. You should enable this flag either if you want
# to write custom TurboModules/Fabric components OR use libraries that
# are providing them.
-newArchEnabled=true
+newArchEnabled=false
iOS
- Open the
ios/Podfilefile - Add
ENV['RCT_NEW_ARCH_ENABLED'] = '0'in the main scope of the Podfile (reference Podfile in the template)
+ ENV['RCT_NEW_ARCH_ENABLED'] = '0'
# Resolve react_native_pods.rb with node to allow for hoisting
require Pod::Executable.execute_command('node', ['-p',
  'require.resolve(
- Install your CocoaPods dependencies with the command:
bundle exec pod install


